
Can Pumpkin Be Grown In A Pot? Pumpkins are a really popular vegetable that many people grow in gardens. However, as many varieties of pumpkins tend to sprawl across large areas there is a perception that to grow a vegetable like pumpkins you need a large space. But is that really the case? Can pumpkins be grown in a container or a pot?
It is possible to grow pumpkins in pots but they generally require a relatively large pot, typically 20 gallons (80 litres) in size to produce a reasonable crop. It is also advisable to select a smaller variety that is more suited to a smaller growing space, however, it is also possible to grow larger varieties if there is space around the container for the vine to trail.
Selecting A Container To Growing Pumpkins In
There are a wide variety of containers that can be potentially used to grow pumpkins in. The lowest cost option is to use a 20 gallon grow bag, these products are made of an extremely light fabric that is strong but has a limited life of a couple of seasons. However, they can look quite attractive if you stick to the same type of bag to produce a uniform, appearance.
Most of the grow bags available are either black or tan in color, I recommend that you use black as it will make the foliage stand out. Click here to see the latest price on Amazon.
The second option is to use a plastic pot, which comes in several shapes and sizes. These types of products tend to be a little more expensive than the grow bags but they will last several seasons. These types of products are also relatively light and are difficult to damage.

However, after several seasons you find that the plastic will become brittle as the containers begin to degrade. The speed that this occurs is dependent upon the quality of the plastics and the degree of sun exposure. To see the latest price on Amazon click here.
The third option, and my personal favorite, is using galvanized steel garbage bins. They are relatively light, longer-lasting than plastic pots and they look good even when they have aged a bit. The other advantage of using steel bins is that they can also be made into a self-watering container if desired whereas are the other options cannot be.
The advantage of this type of set-up is it reduces the chances of the container drying out which is often the main reason people have trouble producing vegetables successfully in containers. However, if that is not your preferred option then simply drill holes in the base of the container for drainage. To see the latest price on Amazon click here.
How To Make A Self Watering Container
To make the bin into a self-watering plant is pretty straightforward. To create a self-watering container you need to create a space at the bottom of the container that can act as a well to hold water. The easiest way to create space is to place rocks, gravel, or sand at the base of the container and cover it with material. The ideal material is textile fabric however, any old tee shirt would probably do the trick.
To ensure that the soil above has access to the water you need to ensure that the fabric reaches the bottom of the container at at least one point. To do this cut a piece of pvc pipe that has a relatively wide diameter (the wider the better) to the height of the reservoir at the base of the container.
Place the pvc pipe in the middle of the base of the container and pack the rocks, gravel, or sand around the pvc pipe but ensure that the pvc it is not filled with any material.
The next step is to drill holes through the side of the bin at the height of the reservoir. The purpose of these is to prevent the water level from getting any higher than the reservoir. If you accidentally over water any excess will flow out of the container once the reservoir is filled.
Once this is done use the material to cover the base of the container where the rocks and pvc pipe are. Push the material down into the center of the pvc pipe to ensure it reaches the bottom of the container. The container can then be filled up with soil and watered from the top periodically.
How To Grow Pumpkins
Whether you are growing pumpkins in a pot or in the garden the plants can be started off in much the same way. Pumpkins can be grown easily from seed and they will germinate quickly in the right conditions.
Pumpkins are a tender vegetable that requires a warm frost-free environment to grow successfully. Most gardeners tend to start plants off as early as possible in the growing season usually undercover around 4 to 6 weeks prior to the last frost.
Seeds should be sown into modular seed trays that contains seed raising mix rather than garden soil or potting mixture as the seed raising mixture is a light mixture that allows the roots to penetrate the soil easily. Seeds should be sown at a depth of 0.5 to 1 inch into the soil. When sowing the seed it is best to place the seed on its side as this will reduce the chances of it rotting.
Pumpkins seeds generally germinate quite quickly and the seedlings will typically emerge within 7 to 10 days provided that there is sufficient moisture and temperature. However, if you live in a relatively cold climate it may be necessary to apply additional heat to the seed tray.
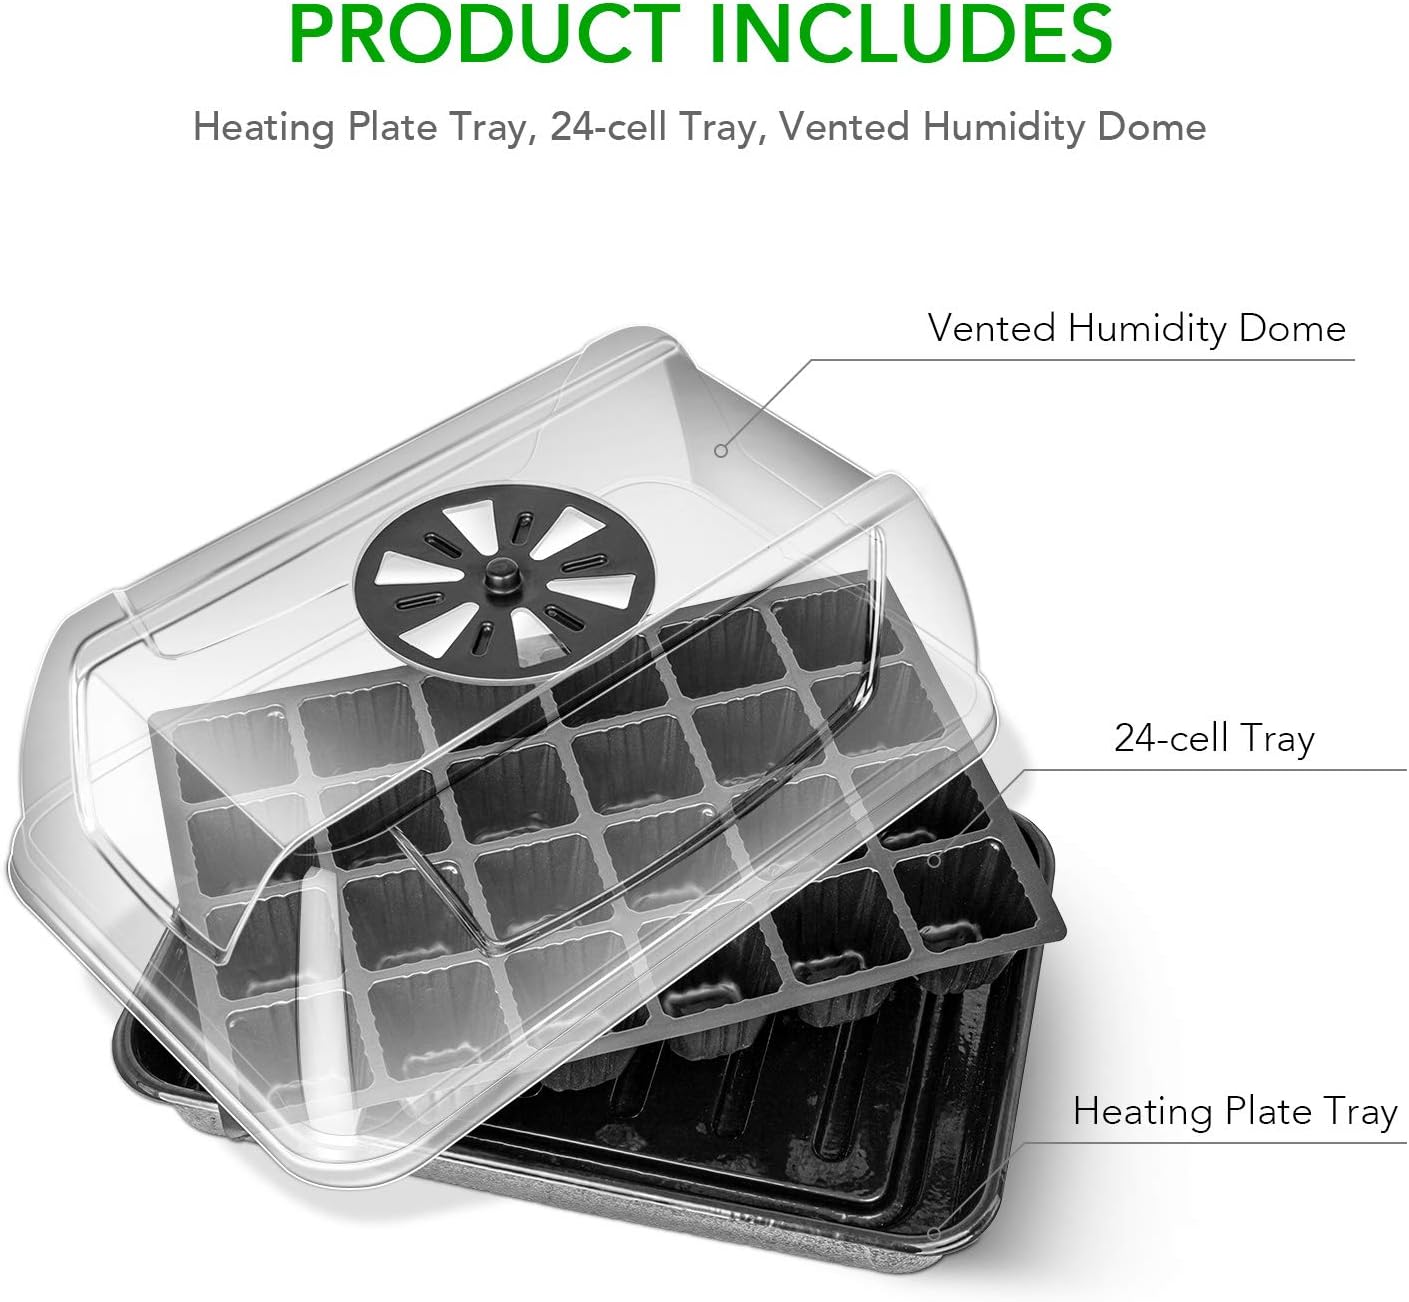
This can be done by placing to tray in a relatively warm location within the house, however, it is far better to use a heated propagation tray as this will significantly reduce the chances of there being major fluctuations in the temperature of the soil which can affect germination.
The one we recommended is the iPower Heating Seed Starter Germination Kit, shown in the picture below largely because it has a vented humidity dome and is relatively inexpensive. Click on the link to see the current price on Amazon.
The seedlings will typically need to spend 4 to 6 weeks in the seed tray before they are large enough to be planted out into the container. Transplanting of the seedlings outside should only be done when the risk of frost has passed.
When growing the plant in a container it is important to ensure that the soil is rich moist and has plenty of nutrients. As such it is advisable to add plenty of compost and well-rooted manure to the soil mixture. Within the container, there should be one plant per pot and it should be planted at a depth that is approximately equal to the depth the plant was originally in the seed tray.
If you decide to sow directly into the container it is advisable to sow 3 seeds to ensure you get at least one plant in the container. If more than one seed germinates it is best to thin plants to the strongest plant.
Once the seeds or seedlings have been planted it is best to place a thick layer of mulch around the plant to help retain moisture and water the plant in well. To avoid slug and snail attacks it is important to sprinkle snail pallets around the plant.
The container should be positioned in a sunny location to maximize sun exposure. However, if you live in a region that has particularly hot summers it may be worth considering also adding hydrogels to the soil as well to aid with moisture retention. To read more about the effectiveness of them click here.
Ongoing Care And Maintenance Of Pumpkins
Once pumpkin plants become established there are a few things you need to do, the first is ensure that the plant is watered regularly. The second is to regularly fertilize the plant every 2 to 4 weeks to make 100% sure that the plant has all the nutrients required.
If you are concerned about the rate of pollination and fruit formation you can hand pollinate the flowers by picking a male flower from the plant and rubbing it against the centre of the female flowers. However, this is generally not required.
Harvesting Pumpkins
As the plant ages, the green fruit will being to increase in size. For most varieties, the fruit will start off as a mid-green color and then become paler green in color as the fruit increases in size. At this point, the fruit will progressively start to change to its final color. At around this time, the foliage of the plant will start to die back and in some cases, it will also start to develop a disease called powdery mildew. This disease looks unsightly but generally has little effect on the fruit.
Allow the plant to die back completely before harvesting the fruit. To ensure that the fruit is ripe check that it sounds hollow when you tap on the side of it, if it does it is usually ready to pick. When removing the pumpkin from the plant it is important to leave about 2 inches of stem on the plant.
The reason for this is that leaving the stem on will prevent bacteria from entering the pumpkin which will extend the shelf life considerably. Pumpkins can typically be stored for up to 12 months if left in a cool dark place.
Related Articles
Can I plant pumpkin seeds from a store brought pumpkin?
Why are my pumpkin leaves turning white?
How Much Space Do You Need Between Pumpkin Plants?
How Many Pumpkins Are Produced Per Plant? And How Big Are They?
Do Pumpkins Grow Back Every Year?
Are Pumpkins Berries? If So, Why?
