
How Do You Keep Greenhouse Panels From Blowing Out? If you are anything like me you have purchased a polycarbonate greenhouse with views of growing your own plants from seed, only to find that there are a few design flaws in the product. Polycarbonate greenhouses are fantastic in still conditions but they simply do not perform well in windy conditions.
The photograph above shows the state of my greenhouse after a winter storm. You will also note that this is not the first time this has happened which is the reason why there is tape on many of the panels. So how do you keep greenhouse panels from blowing out?
Greenhouse panels blow out because the polycarbonate panels bow in the wind resulting in the panel popping out of the groves holding them in place. To prevent this the panels need to be reinforced with timber that clamps around the frame to prevent or minimize movement. This reinforcement is particularly important for longer roof panels that are most susceptible to damage.
As damage to the greenhouse will almost certainly happen at the most inopportune moment it is important to minimize the chances of it happening again. As such it is advisable to purchase thicker polycarbonate panels as this will also reduce the chances of future problems.
The majority of domestic polycarbonate greenhouses are made using 4mm twin-wall polycarbonate panels which flex relatively easily. It is advisable to use 8mm polycarbonate which is immeasurably stronger, less flexible, and will last longer.
However, one of the problems that you may encounter with using thicker panels is that they do not fit into the grooves in the aluminum frame. The way to overcome this issue is to slit the connecting piece between the top and bottom layers of the panel. The slitting of the panel will allow the bottom part of the panel to slide into the groove while the top layer sits on top.
While you may think that this weakens the panel and makes it more susceptible to damage, my experience has been the opposite. This is because it is difficult to keep an even distance between the top and bottom layer when slitting it. This variation in distance results in the panel being squeezed between the upper and lower lip of the frame at some point which minimizes movement.
In fact, it is likely that you will have at least some difficultly getting the panel to slide into the frame. I personally used a piece of wood with a hammer to tap the panels in place.
How To Reinforce Polycarbonate Panels
The easiest way to reinforce the polycarbonate panels is to use thin pieces of treated pine on either side of the panel, I personally used 18 mm thick strips on either side of the panel. To minimize the panel movement it is necessary to attach an additional piece of wood on the inside of the greenhouse between the main timber pieces and to minimize panel movement. An example of this is shown in the image below.
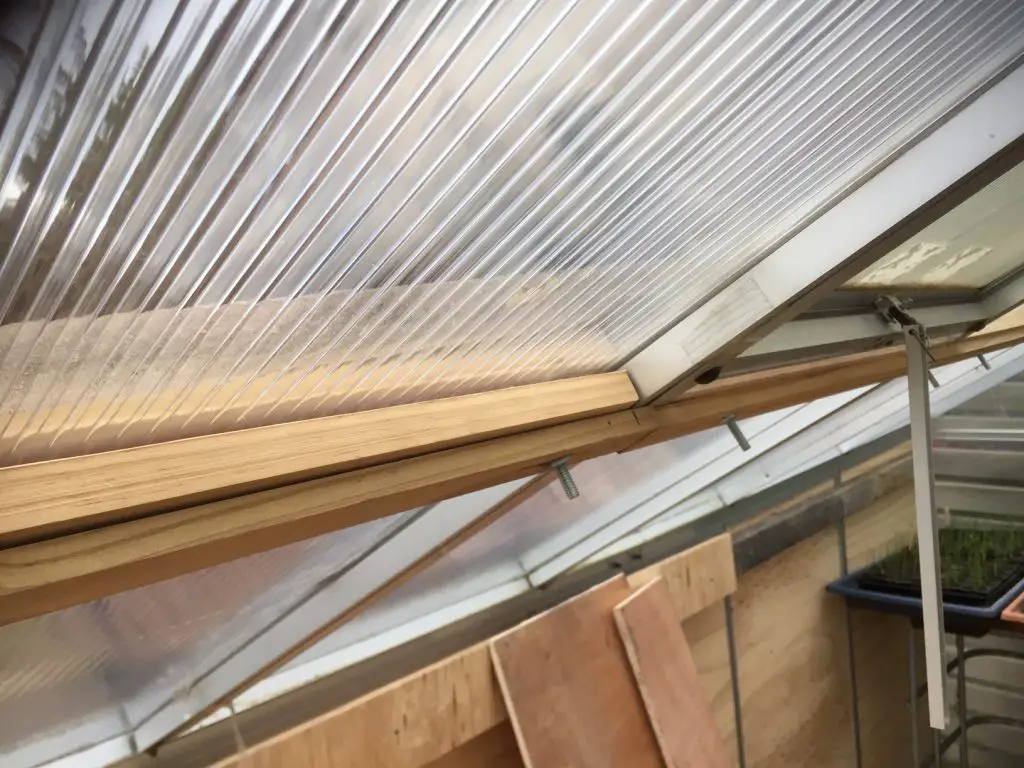
To attach the reinforcement strips to the panel it is necessary to drill through the panels and then use a nut and bolt to clamp the wood on either side of the panel together. This reinforcement prevents the panel from bowing even in strong winds. The additional advantage of this set-up is it allows any damaged panels to removed and replaced with disturbing other ones.
In terms of the positioning of the reinforcement, I have placed a single strip in the middle of the panel. I found the one strip is sufficient to stop the loss of panels. However, if you live in a particularly wind-prone area you could potentially add a second reinforcing strip.
How To Mount The Reinforcement Strips
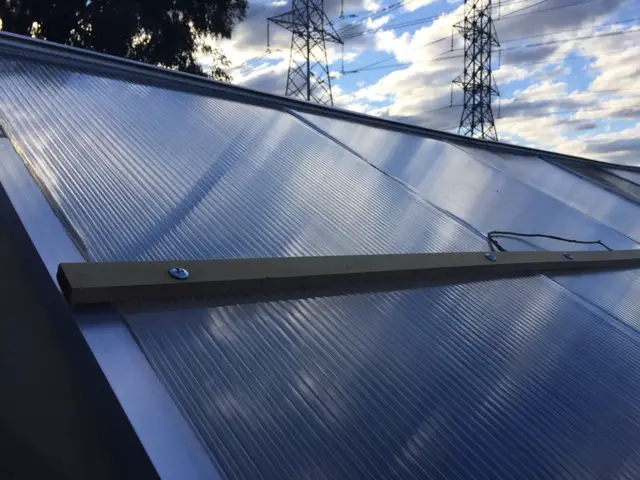
Mounting the reinforcement can be a little tricky, mainly because of the lining up of holes in both pieces of timber strips and the panel can be difficult. The easiest way to do this is to start by cutting the upper and lower reinforcing material to length. The material needs to be sufficiently long to reach across the frame on either side of at least one panel so that timber is able to clamp onto the frame. See the image below.
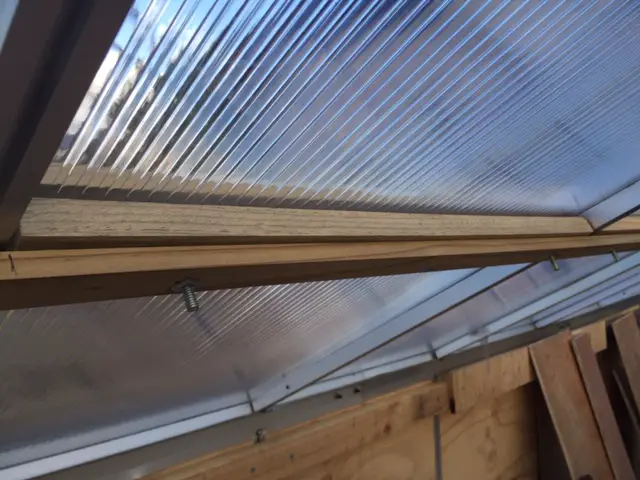
Once this is done, place the reinforcing timber in position in the greenhouse and mark the position where the timber comes into contact with the frame at every point this occurs. These marks will be used later to line up the inner and outer pieces of timber. If you look carefully at the image above on the inside of the greenhouse you can see the marks that have been made with a black marker.
The next step is to cut the secondary pieces that will sit next to the panel and attach them to the main reinforcing piece of timber. At this point, it is advisable to double-check that the inner reinforcement piece sits snuggly against the greenhouse panels.
Once the reinforcement pieces are ready the outer and inner pieces can be aligned using the ‘frame’ markings and then the holes for the bolts and nuts can be predrilled. This will ensure it is easy to align everything.
Take the inner reinforcement piece and place it in position on the underside of the panels. Drill through the existing holes up into the panel. Once all the holes in the panels are completed place the outer reinforcement piece in place and push the bolt through the holes. Attach the inner reinforcement piece but pushing the bolt through the holes and tightening the nuts.
Anchoring Your Greenhouse Down In The Wind
Apart from having panels blown out, the other common problem is having the greenhouse blown around in the wind or even tipped on its roof (this has happened to me). As polycarbonate greenhouses are fairly light it is necessary to secure them to the ground.
This can be done by attaching brackets by drilling through the frame at the base of the greenhouse. However, what the brack is attached to needs to be extremely heavy or secured into the ground. The greenhouse should be secured in the four corners of the greenhouse.
For my greenhouse what I have done is replace the side panels with marine plywood rather than polycarbonate. This strengthens the greenhouse significantly and increased its weight making it less susceptible to wind. The wooden sides also allow internal benches to be attached to the walls of the greenhouse as well which further reduces the risk of future problems.
It is important to note that the replacement of the sides also has a limited impact on the amount of light getting to the greenhouse provided that the greenhouse is oriented correctly in a north-south orientation. As you can see from the photograph below.
If you are considering replacing the sides with timber the easiest way is to get the panels precut to size at your local hardware store as that will make the process a lot quicker.
Good luck with your greenhouse hopefully you have better luck than I did, cheers.
