
Can You Espalier An Orange Tree? Orange trees can be pruned into an Informal Espalier. Informal Espaliers take up very little space and still produce a sizeable crop. Despite the hefty price tag associated with buying a ready-made Espalier Orange tree from a Garden center, which would have you believe that creating one is a complex and difficult process, it is actually a surprisingly easy thing to create.
Almost any type of tree, including an Orange Tree, can be shaped into an Informal Espalier. Espalier trees are commonly positioned up against a wall or existing structure, however, there is no reason why the trees can’t be positioned in the middle of the garden. Many gardeners use Espalier trees to produce living garden walls, that divide up a garden space into smaller sections.
What Is The Difference Between Formal And Informal Espalier Trees?
A Formal Espalier, are trees that have been pruned to create a symmetrical shape with branches in predefined positions. The most frequently used form is the T shape because it is easy to create. In a T form, there is a central stem, with branches coming off either side of the main stem, at regular intervals. The spacing between these branches is typically 30 cm (12 inches). To create this branch configuration a support structure is required to hold the tree in shape while growing. To maintain the structure, side shoots are removed regularly.
While the T-Shape is common there are many different shapes that can be created. To read more about the different shapes of Formal Espaliers and how to create them, click here or watch the youtube video below.
An Informal Espalier tree differs from a Formal Espalier tree, because there is no predefined branch structure created. The branches are allowed to grow in a more natural way, although they are still tied back onto the support structure and pruned regularly to create the two-dimensional flat shape.
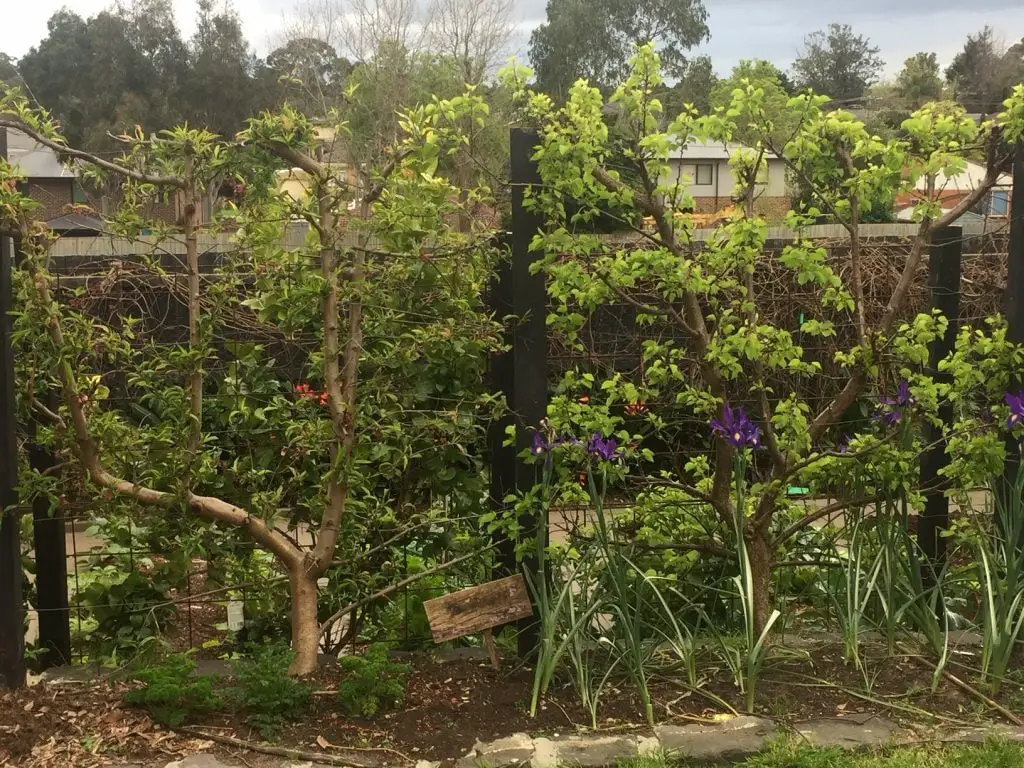
The Orange tree is most suited to the Informal style of Espalier, as it is difficult to create a formal structure with Citrus trees. This is largely because the branches tend to grow at a angle of 45 degrees or greater and generally lack the flexibility to be bent into formal shapes. An example of an Informal Espalier is shown in the picture below.
How To Create An Espaliered Orange Tree
Step 1 – Selecting The Location
The first consideration when creating an Espalier tree, is the location. Most fruit trees including Orange trees require a sunny location with rich, moist and well-drained soil. Fruit trees benefit from having compost added to the soil initially and being regularly fed with an organic fertilizer. The pH of the soil, should ideally be around 6.0 to 7.0. To learn more about the importance of pH, go to https://planyourpatch.com/why-is-ph-important-in-soil/.
As mentioned at the start of the article, Espalier trees tend to be placed against the walls of an existing structure such as fence, house or shed, in most gardens, however, this does not need to be the case. Espalier trees are a terrific way to divide the garden into smaller spaces to create interest in a garden.
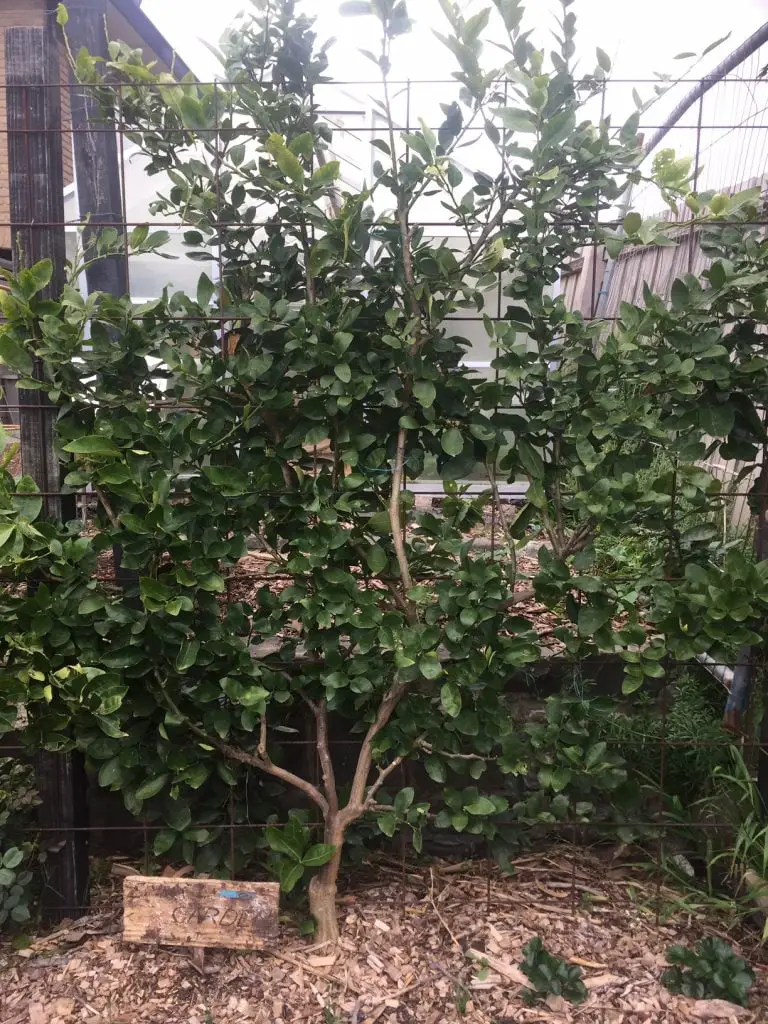
Citrus trees are ideally suited for this, as they are evergreen, which allows a solid wall to be created year round. To create a wall, it is best to plant the trees 1.8m (6 ft) apart, as this will allow a continuous structure to be created within a couple of years.
Step 2 – Creating The Support Structure
The next step required is the creation of a support structure. Structures can be created with a range of different materials which include Wire, Bamboo Stakes, Wood and Wire Fencing Mesh. However, my preferred materials for this job is Reo Mesh as it is cheap, easy to erect, sturdy and long lasting. Additionally, the Reo Mesh provides numerous anchor points to tie the tree to.
This is an important consideration when creating the support structure for Informal Espaliers. Unlike Formal Espalier trees which have predefined branch positions, it is not possible to know in advance the points that the tree will need to be tied to.
Step 3 – Selecting And Planting The Tree
Having created the support structure for the tree, the next step is to select a tree from the nursery or garden centre. They can also be purchased online from places like Morgan and Thompson. In general, smaller trees are preferred, because it is easier to train them into the required shape and they are also lower in cost. Additionally, it is important to avoid trees that have an infestation of Gaul Wasps. Gaul Wasp, which presents as lumps on the branches of the tree limbs, will need to be cut out.
To plant the tree, create a hole in front of the support structure. Ideally, it should be in a central position to allow the tree’s limbs to be distributed evenly, across the structure. The hole should be about 30cm (1 ft) wider than the pot the tree came in, with a depth that is approximately equal in height to the pot.
When removing the tree from the pot, it is best to tease the roots out a little bit with your fingers, as this will encourage the tree’s roots to spread out into the surrounding soil. The next step is to place the tree into the hole you created, ensuring that the root ball of the tree remains level with the surrounding soil.

Backfill the hole with soil and ensure that it is firm by pushing on it with your heel. This will reduce the chances of there being any air pockets left and will avoid a divot forming later, around the tree.
After the Orange tree is in the ground, water it thoroughly and then spread a 5-10cm (2 to 4 inch) thick layer of organic mulch, around its base. To avoid any chances of collar rot, ensure that the mulch does not come into contact with the trunk.
Step 4 – Creating The Espalier
To create the Espalier, start by selecting the thickest vertical shoots on the Orange tree. Tie these shoots, using plant ties or garden twine, to the support structure. It is important to note, that care should be taken with the materials used to tie the tree to the support structure. Using wire, over time will cause damage to the trees branches. As the branches thicken, wire can cut into the branches, impacting the development of the tree.
When tying the branches to the structure, it best to cover the structure as much as possible, by spreading out branches across the surface of the support. This process will aid in filling up the support structure more quickly and allow more room for fruits and flowers to develop. If there are any major branches that are protruding outward from the structure and cannot be tied in easily, they should be removed.
The smaller branches on the tree, which are generally younger and more flexible, can then be tied into the structure. This is best done by bending them into the structure, however, if it is not practical to do this, remove the branch with a pair of Secateurs.
Step 5 – On Going Maintenance Of The Espalier
To ensure your Orange trees remain healthy, ensure that it is regularly watered. The tree will be susceptible to a lack of water in the first few months, as the roots are yet to fully spread out. In the first months, it is best to water weekly and possibly a little more frequently during hot and dry spells. It is also necessary to reapply mulch on a regular basis to ensure water retention and fertilise every 3 months.
As the tree continues to develop new growth, it will need to be tied into the structure to ensure that the tree maintains its shape. In the growing season this will need to be done, every 6 to 8 weeks. Additionally, any unwanted branches will need to be removed, which typically will be branches that are crossing or coming outward from the structure. If pruning is done regularly, the job will take less than 5 minutes.
If the tree does not receive regular maintenance for a period time, it is not a disaster, as the tree can always be reshaped with a hard prune. However, it is important to note that a hard prune in Winter will result in rapid growth in Spring, whereas pruning in late Summer will result in significantly less growth. As such, the tree may require multiple prunes, to regain the ideal shape.
Relevant Articles
How Much Fruit Does A Dwarf Orange Tree Produce?
When Do Apricot Trees Bloom? (Does It Vary With Different Cultivars?)
What Is The Difference Between A Cherry Blossom And A Cherry Tree?
At What Temperature Should You Cover Fruit Trees?
