
How Big Do Espalier Trees Grow? Espaliering trees is a French technique of pruning which allows a tree to be kept relatively small, while maximising the fruit production.
The size of an Espalier tree is controlled, primarily by the gardener and the way that they prune. Even the largest tree can be maintained to a size, that suits your garden. An extreme example of this, used in some gardens, is step over Apples, which are controlled to a height of 30cm, by training them horizontally along a wire. And even though the height is severely restricted, these step over Apples produce plenty of fruit.
For those that are considering including an Espalier Tree in their garden for the first time, I would highly recommend it, particularly if you are creating or adding to an existing productive garden. Not only are they ornamental, but they provide several practical benefits over conventional trees.
The key advantags of an Espalier Tree for the home gardener, is that it allows many more different varieties of trees to be planted in the garden. I personally have over 50 different fruit trees, planted at home on a standard suburban quarter acre block. This allows me to diversify and spread my harvest across the year, so that I have fruit available for 10 months of the year.
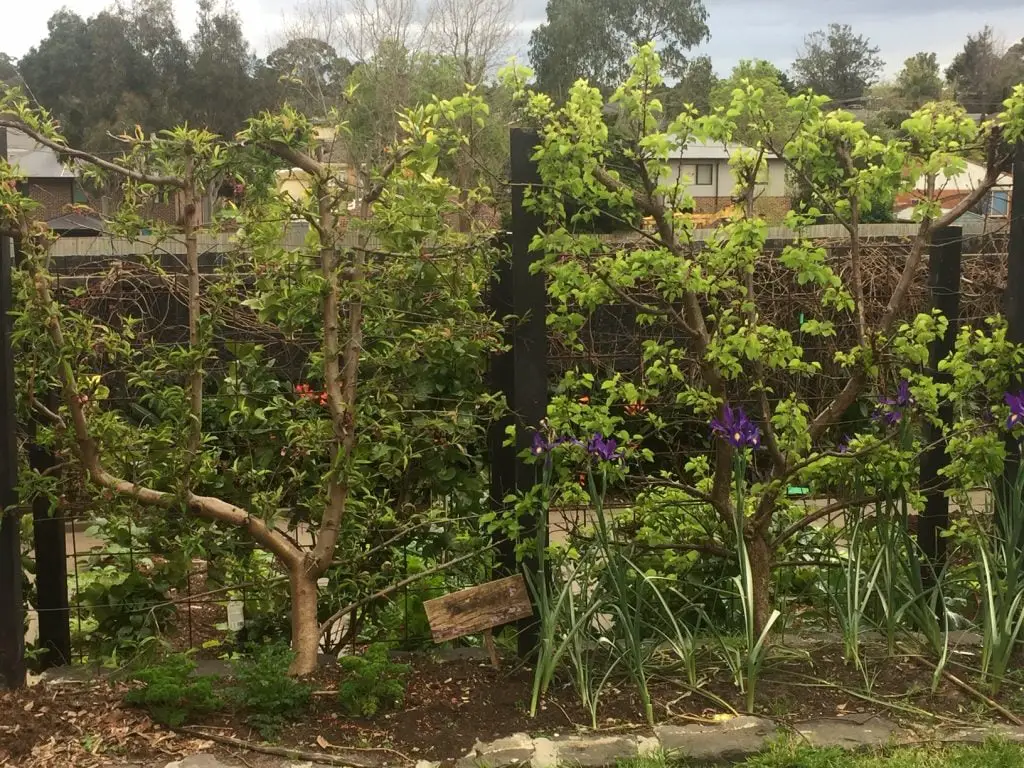
The second key advantage of an Espalier tree, is that it ensures you can access all of the fruit on the tree easily, and net the fruit tree, to protect it against birds, if desired. Most of my Espalier trees are 1.8 m to 2 m (6 to 7 ft) tall, which allows me to pick the fruit from the ground easily.
Due to these two factors, it is often the case, that a gardener will harvest more from an Espalier Tree, than a much larger tree grown in the conventional manner. To give you a idea of the volume of harvest, we took in well over 10 kg of fruit, from a single Espalier Plum tree, that was 1.8 M (6 ft) tall and 1.8 M (6 ft) wide.
How Much Work Does It Take To Restrict The Size Of An Espalier Tree?
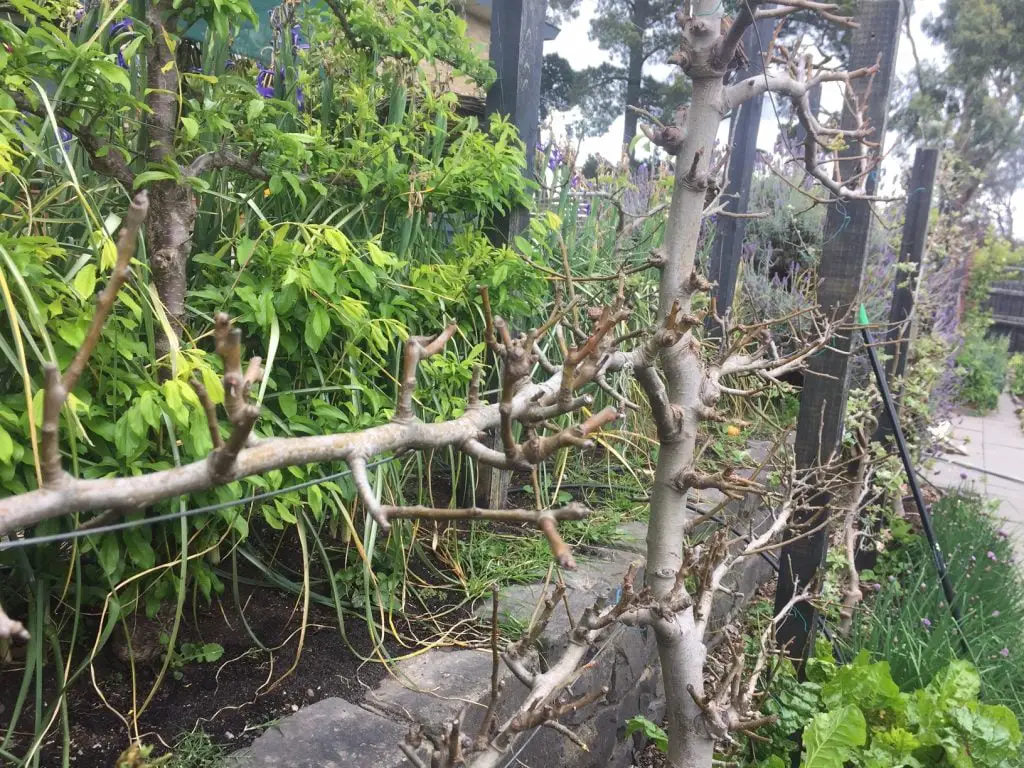
Restricting the size of a tree, generally does not take a lot of work. Most gardeners trim the tree once through the Winter, the nature of this prune is dependent on what stage the Espalier Tree is at. For mature trees, it only requires a light prune to tidy up the tree, which usually only takes 5-10 minutes per tree. For younger espalier trees, a harder prune is required to encourage growth. Trees respond more aggressively with growth when pruned in Winter.
From late Spring through to the end of the growing season, pruning is required to keep the Espalier tree neat and looking good. Typically, this requires a prune once every 2 months or so.
If for some reason the tree does not receive its regular maintenance for a period of time, it is not a disaster. It can always be reshaped with a hard prune however if you are dealing with a mature tree, it is best to prune in Summer and Autumn. A hard prune in Winter will result in rapid growth in Spring, and additional prunes will be required, to regain the ideal shape. To learn more watch the video below.
What Types Of Trees Can Be Espaliered?
Pretty much, any type of tree can be espaliered to create a two-dimensional shape. However, the type of espalier that can be created, can vary depending upon the type of tree.
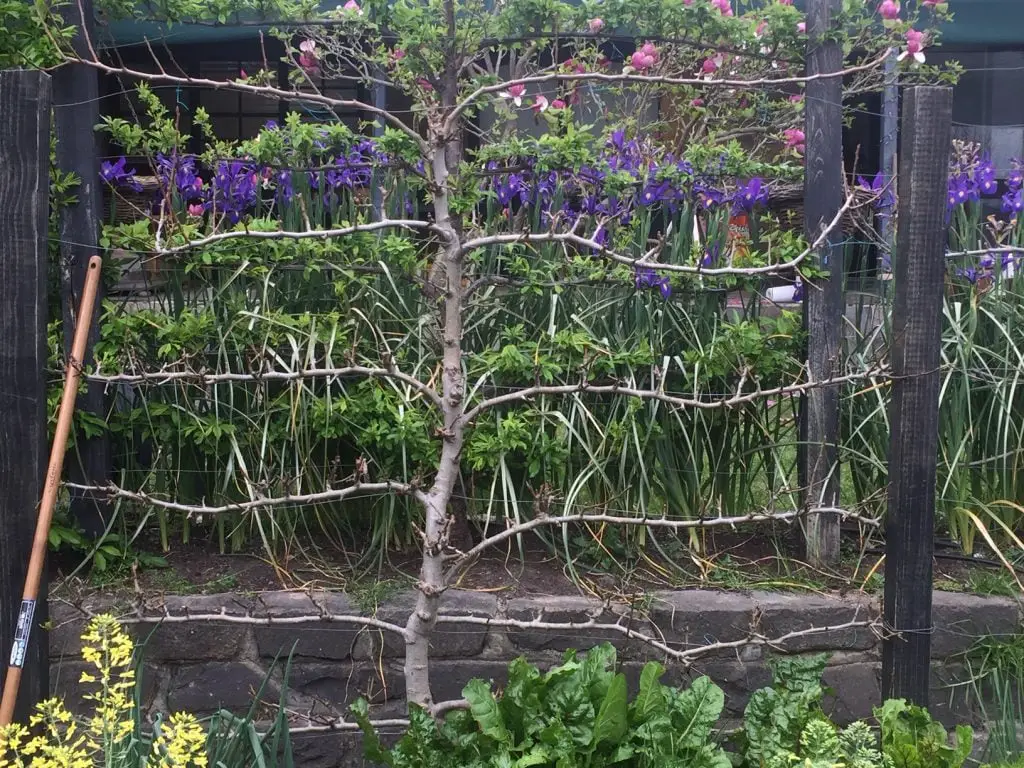
There are two major types of Espalier trees, formal and informal, that can be created. A formal espalier tree is one that has been pruned to create a defined structure of branches. This structure is usually symmetrical in shape, with many different patterns possible. The most common shape is the T form, which is shown in the picture below.
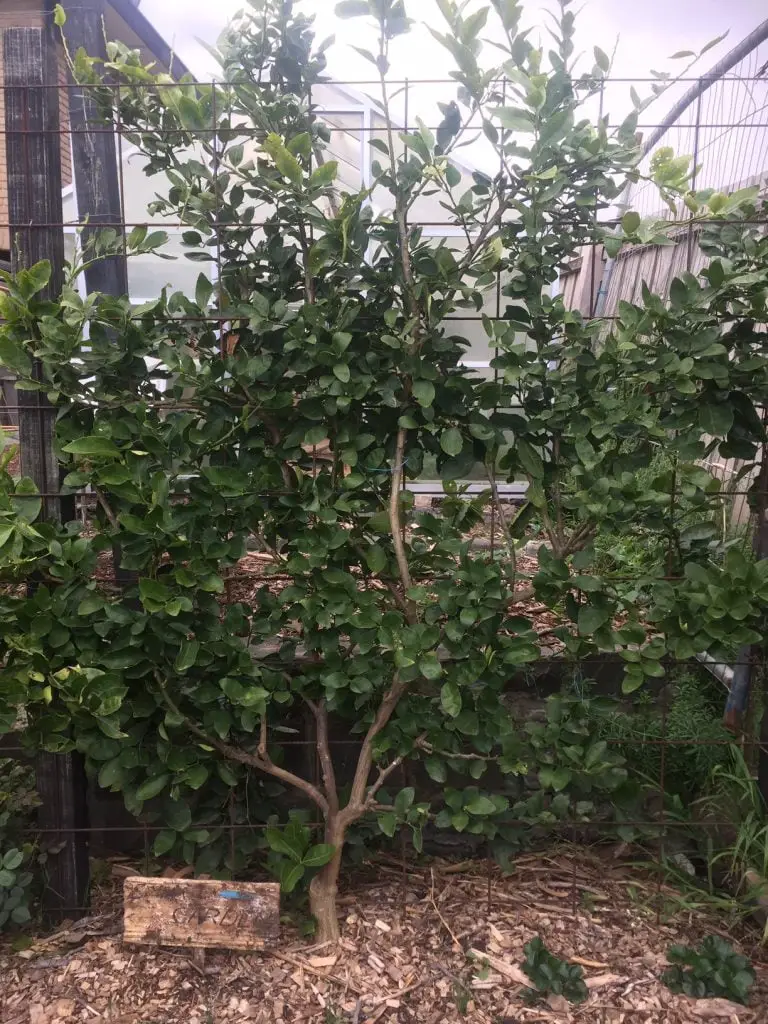
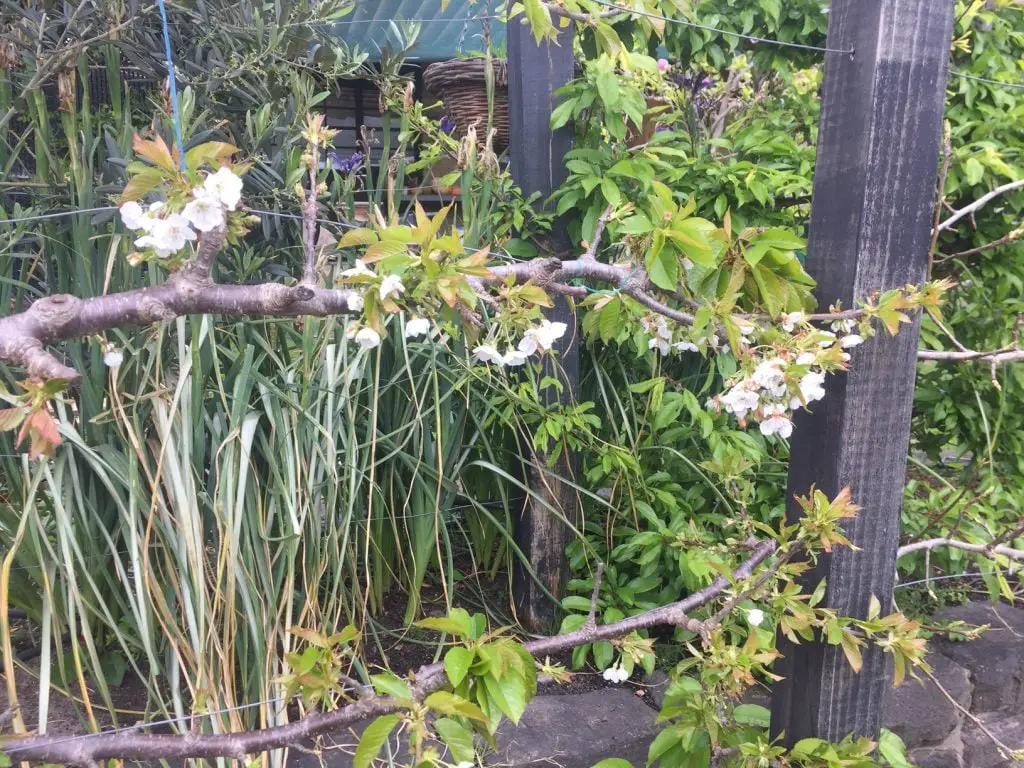
The other type is an informal espalier tree, which has no defined branch structure. The branches are allowed to grow in a less controlled manner and are simply tied back onto the support structure to maintain a two-dimensional flat shape. This type of espalier is most suited to trees that have less flexible branches, that have a greater tendency to break when forced into a specific position. An example of an informal espalier is shown below. To learn more about creating informal espaliers, go to https://planyourpatch.com/can-you-espalier-a-lemon-tree/.
How To Create A Formal Espalier
When creating a formal Espalier tree, it is best to start in late Winter. The reason for this is that at this time of year it is possible to buy young bare-rooted trees, that are relatively cheap and ideal for starting an Espalier. If you are on a tight budget, you can wait until the end of Winter to buy the tree, as they are often discounted heavily by stores to clear stock. The fruit trees that are most suited to the formal style are Apples, Pears, Cherries, and Plum trees.
Step 1 – Selecting The Location
The first step when planting a tree is deciding upon its location. Any tree that produces flowers requires a sunny location, and generally, most trees prefer rich, moist, and well-drained soil. The pH of the soil should ideally be around 6.5 to 7.0. To learn more about the importance of pH, go to https://planyourpatch.com/why-is-ph-important-in-soil/.
Espalier trees are often placed against the wall of a fence, house, or shed, however, this does not necessarily need to be the case. They are very useful garden dividers, that can be used to create smaller, more intimate spaces. In my own garden, I use Espalier trees to create a large garden room, that houses my vegetable plot.
If you are planning to use the Espalier trees as a wall, it is best to plant them 1.8m (6 ft) apart, as this will allow the wall to become a continuous structure, within a couple of years.

Step 2 – Creating The Support Structure
Once a site has been selected, a support structure must be erected to enable the tree to be trained. The structure does not necessarily need to be permanent, as over time, the trees will stay in the structure created.
My preference is to use wire that is strung out in horizontal lines, that are spaced 30 cm (12 inches) apart. This is typically done by stringing the wire between 2 posts, that are 1.8 to 2.1 m (6 to 7 ft) apart, (that is what was done on the plum trees above), or attaching wires to an existing structure, such as a fence.
Structures can also be created with a range of other materials, including Bamboo Stakes and Fencing Mesh. Prefabricated structures, such as Wood, Timber, Lattice, or Reo Mesh, can also be used.
Step 3 – Selecting The Shape Of Espalier Pattern To Be Created.
There are many possible patterns and shapes that may be created within a formal Espalier, the most common form is the T shape, which was discussed earlier in the article. However, if you are feeling more adventurous, the picture below shows some alternative patterns you may want to consider. Patterns E and F can be used to create a “Belgian Wall”.

The rest of this article, will cover how to create a T shape Espalier. The principles used to create this shape can be easily applied to create any of the shapes above.
Step 4 – Selecting And Planting The Tree
Once the structure has been created and your pattern of espalier has been selected, it is time to plant the tree. Using bare-rooted trees is by far the easiest way to start off an Espalier tree. However, if you are in a period of the year where bare-rooted trees are not available, it is best to choose smaller trees, as they are easier to train. Thompson & Morgan has a really wide selection available online.
When planting the tree, dig the hole in front of the center of the espalier support with a spade, about 30cm (1 ft) wide. Remove the tree from its packaging and place it in the hole. The tree should be planted so that the graft union between the rootstock and the scion, is at least 5 cm (2 inches) above the ground. If the graft union is buried below the surface, it is more likely that you will get suckers appearing.

Water the tree thoroughly, and spread a 5-10cm (2 to 4 inch) thick layer of organic mulch, around the base of the tree. Ensure that the mulch does not come into contact with the trunk, to avoid collar rot.
Step 5 – Creating The Espalier
When creating an espalier in a T shape, the first step is to select a leader to form the central stem of the structure. If there is more that one stem, select the strongest one. The other stems can either be removed or in some cases, it may be possible to bend the branches down, from the first tier of the espalier.
Once the leader has been selected, cut it at the same level as the tier you want to create. Don’t worry if this cut means that you remove 3 quarters of the growth, the tree will respond and recover. This type of cut is best made in Winter, as the tree will respond aggressively with growth.
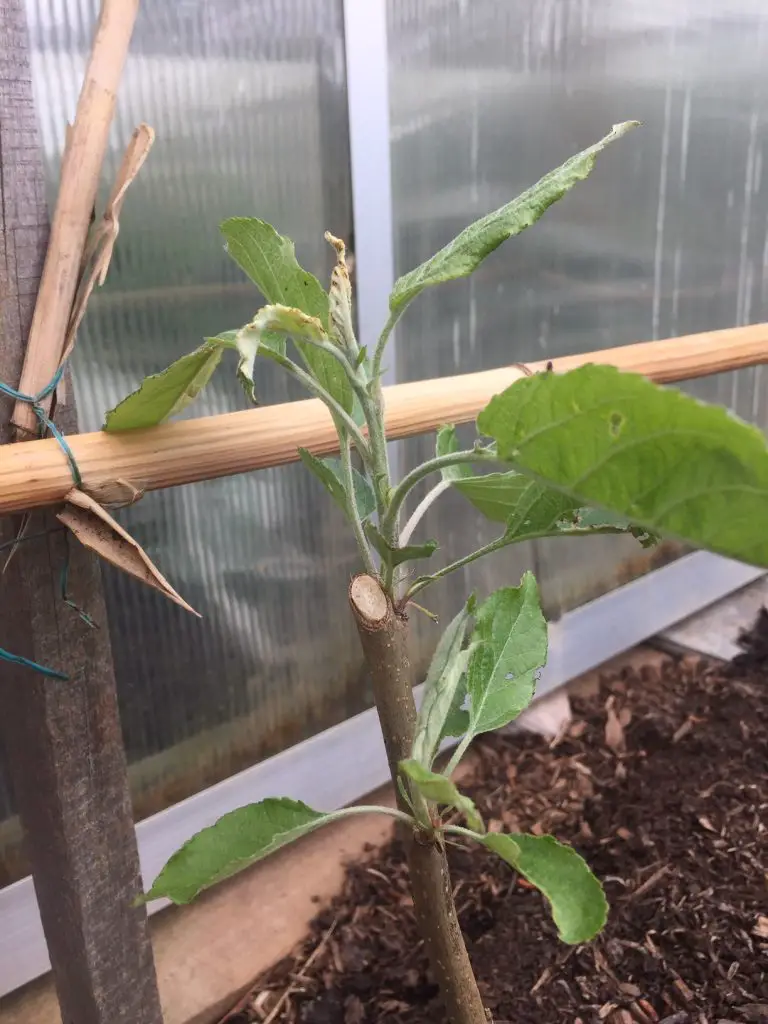
The cut at the level of the tier will simulate the tree, to produce 3 stems normally. The two side stems can be tied down along the wire, later in the season, to form a tier. The central stem is allowed to grow skyward until the following Winter, where the process is repeated to create the next tier. This process continues until the tree reaches the desired height.
Step 6 – Encouraging The Formation Of Fruit On An Espalier Tree
As the tree begins to mature, side shoots will develop on the older tiers. These side shoots, need to be pruned in a way that encourages the formation of fruiting spurs. To do this, prune and size shoots back to one inch, from the main branch. The reason one inch is left on the stem, is that creates more space for fruit to develop along the branch. Over several years, you will build up the number of fruit buds, and hence the volume of fruit that can be produced from the tree.
The pruning of side shoots is best done during the growing season, as it will reduce the amount of regrowth that can occur.
Relevant Articles
7 Easy Steps To Creating An Orchard In Your Own Yard
Should I Top My Fruit Trees? Is That The Right Thing To Do?
Can You Espalier A Lemon Tree?
How Tall Do Raspberries Grow? (The Type Of Raspberry Matters)
